Intro #
Our asset manager uses the new Blender Extensions feature to allow users to connect directly to iMeshh so they can download and install the addon remotely without needing to ever download any .zips.
This also allows users to get frequent updates directly from within Blender. We highly recommend users follow this set-up to get connected
Installation using our online repository – It’s the best way! #
Follow these quick easy steps to get going!
- Open Blender 4.2+
- Go to Edit>Preferences>Get Extensions
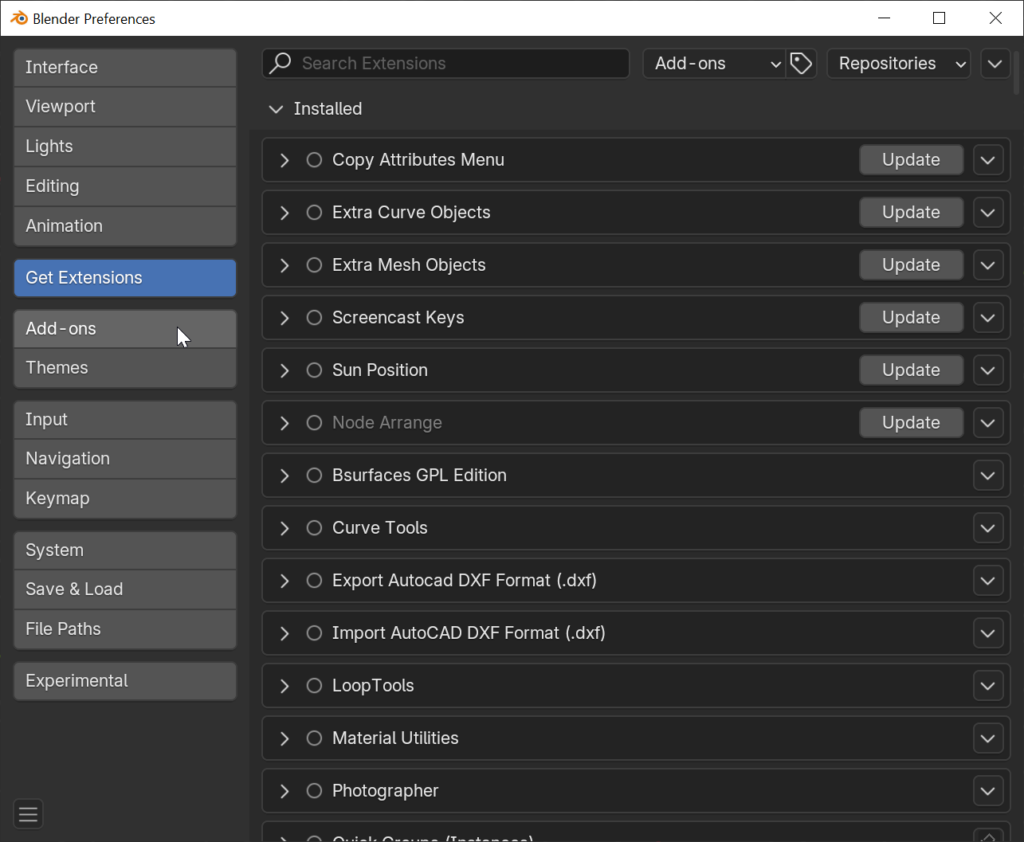
- Then click Repositories in the top right corner

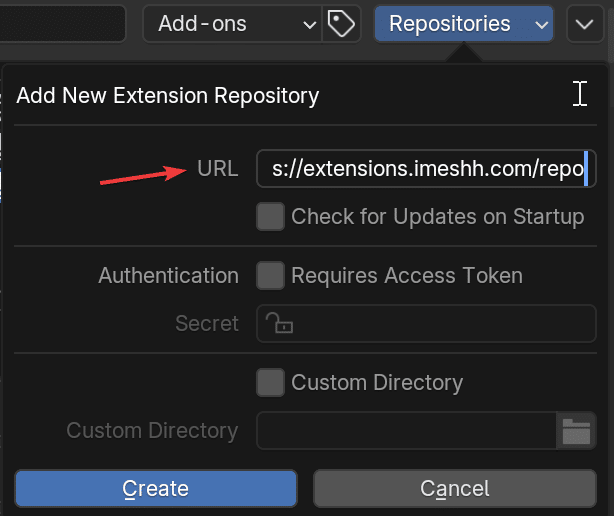
- Click + and click “Add Remote Repository”

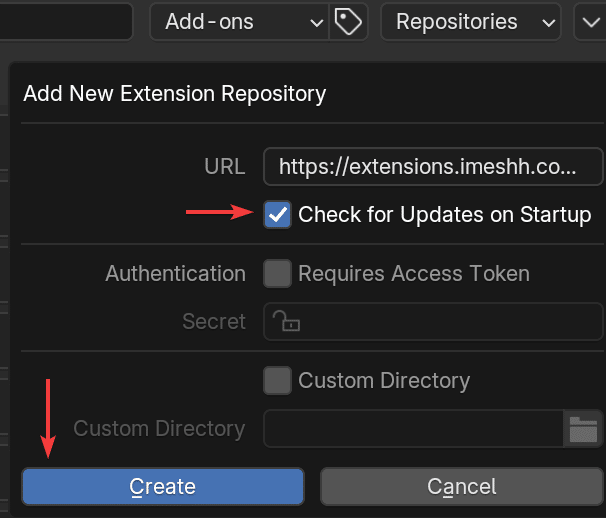
- Click Check for Updates on Start-up and then click Create
- Search iMeshh in the search bar while in Extensions and click Install

- Go to Add-Ons and Search iMeshh and your new addon will display!
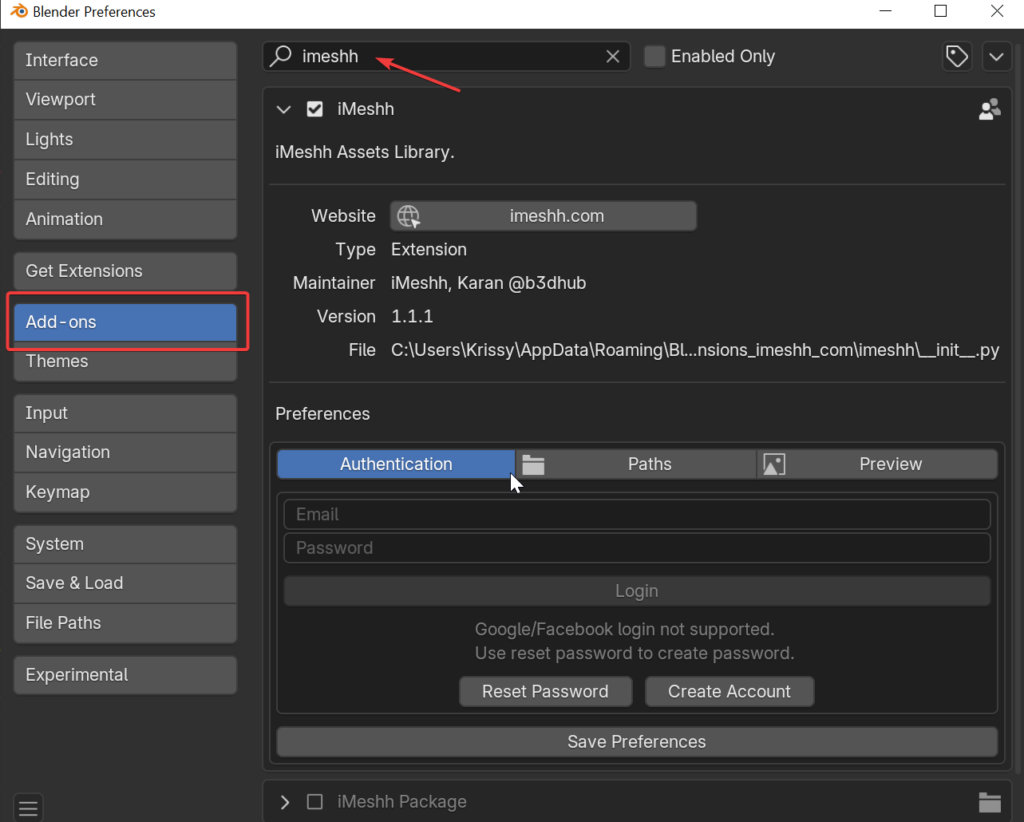
- NOTE: You may need to restart Blender if things are not loading correctly
- Log in! See log in detail below
Local Asset Management #
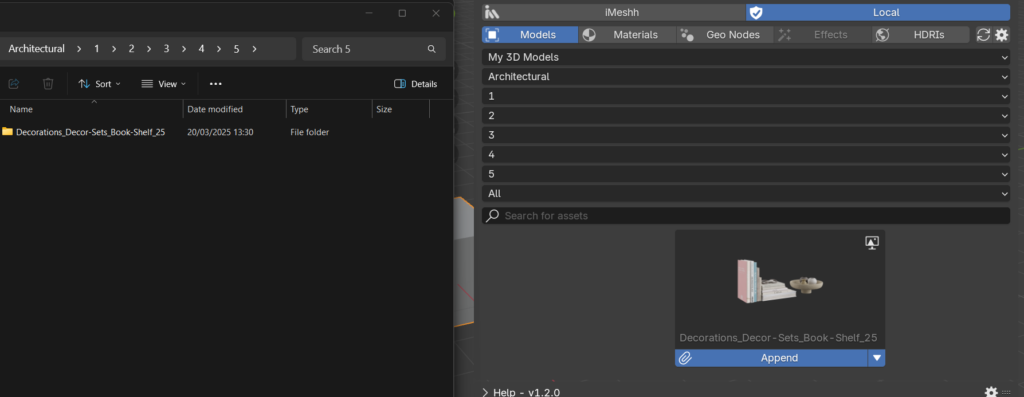
We know most users have their own asset libraries, so we designed the addon to keep everything in one place. At the top, you’ll find a “Local” tab, which organizes and displays your assets based on your computer’s folder structure.
How to add your own folders #
- Inside the preferences panel navigate to the Paths tab
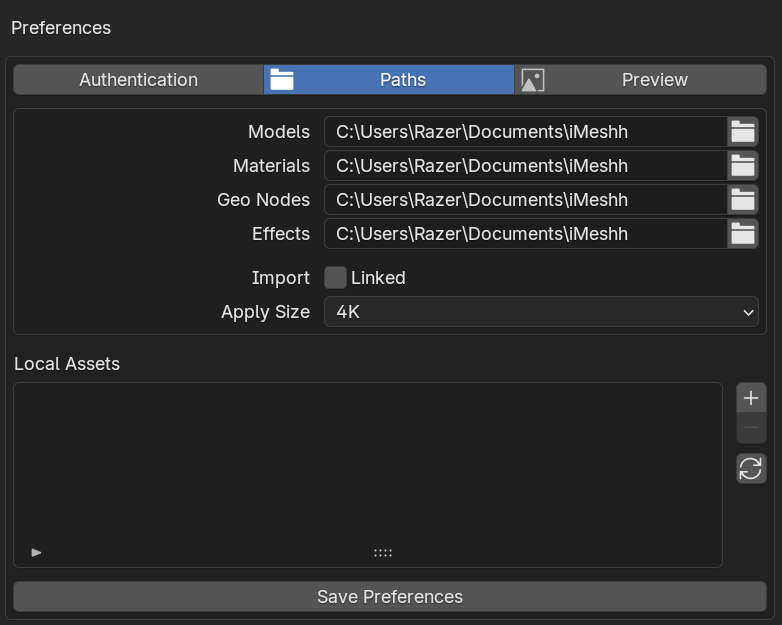
- Here we can click the + icon and we can choose any folder we like which contains any .blend file
- Then we want to Define the Folder Type and Specify what’s inside the folder: Objects, Materials, HDRIs, Geo-Nodes or Effects.
- How Each Asset Type Behaves
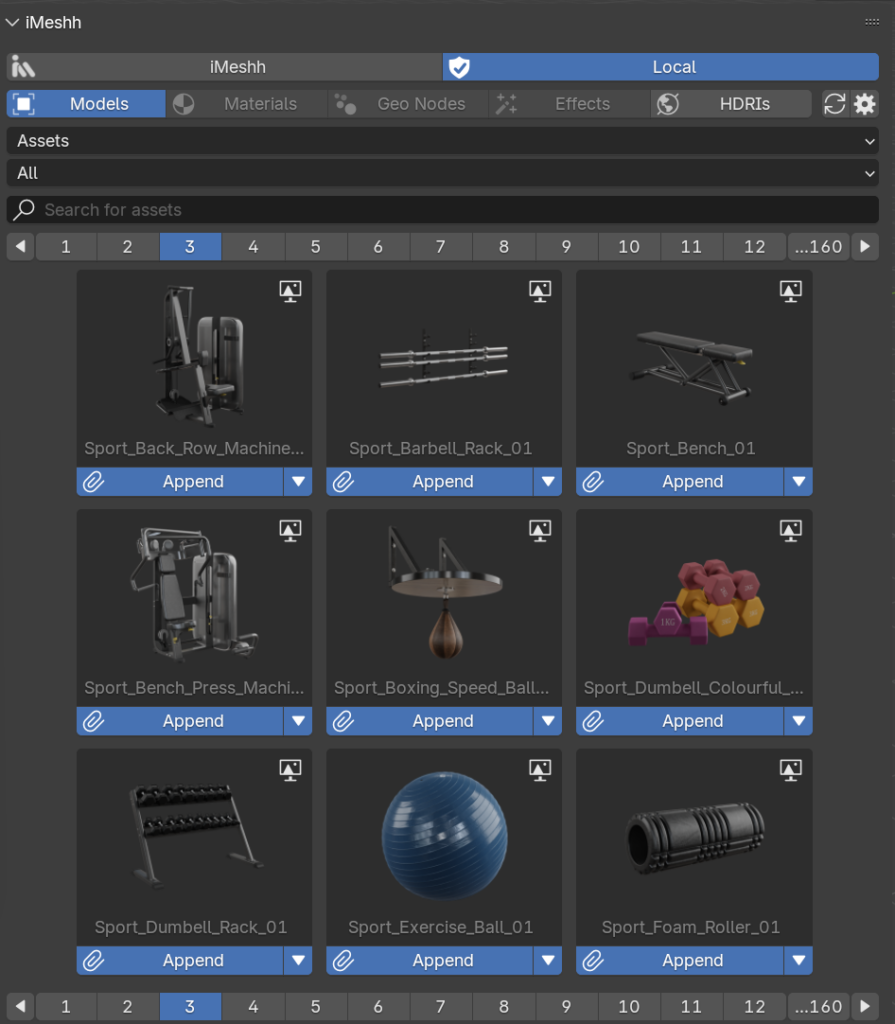
- 3D Models → Appended into the scene.
- Materials → Appended and applied to the selected object.
- Geometry Nodes & FX → Appended into the scene.
- HDRIs → Applied directly to the world nodes.
- How Each Asset Type Behaves
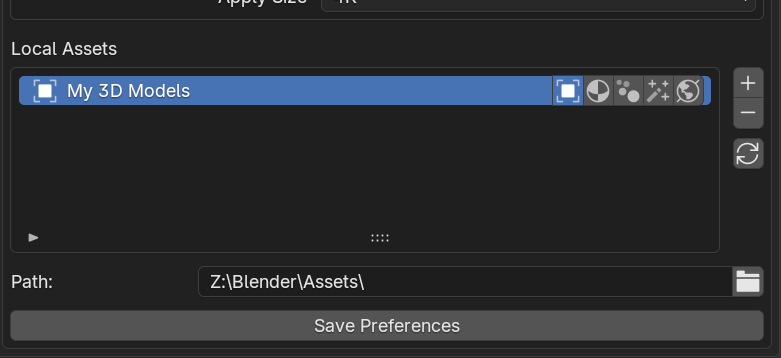
- Once we add all the folders we like, we can then see them inside the addon
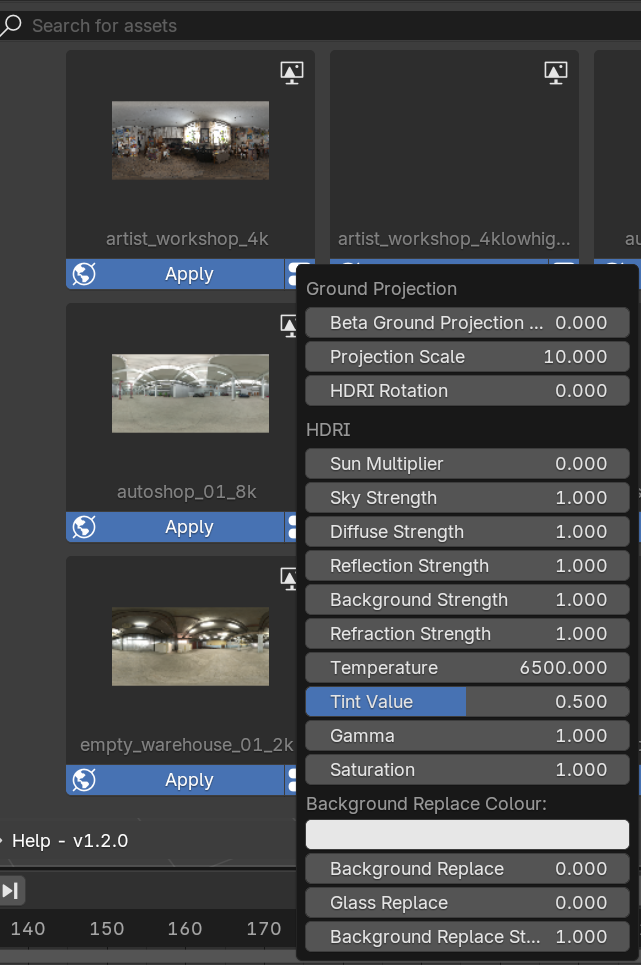
Using the HDRI tool #
We kept our original HDRI tool which our users loved from our previous asset manager.
To access this, click “Apply” on the HDRI you want and then click the “settings” icon.
This will pull up a pop-up panel allowing you to adjust a variety of parameters from directly within this tool without having to go to the world settings tab.
How to structure your folders #
While we tried to be quite flexible, there are a couple things to consider.
- Thumbnails will only display if there is an image file with the exact same name as the .blend file

- Folders can be as deep as you like, the addon will use your systems folder structure
Why not use the asset browser instead? #
In Blender, adding an object to the Asset Browser requires opening every file and preparing it first. This can be inconvenient, especially for professionals who already have extensive asset libraries—often thousands of assets—organized in their own file structures. Since these assets are already categorized effectively, why not use the existing system?
Another limitation we’ve encountered is how Blender handles .blend files in an asset library. When a file contains multiple assets, such as a decorative set with 10–20 individual items, we typically want to import everything at once. However, Blender’s Asset Browser doesn’t support parented objects (as of writing), meaning we must mark the entire collection as an asset. When importing, this requires an extra step: using Make Instances Real before any edits can be made.
While the Asset Browser is a great tool, it doesn’t fully align with our workflow. We prefer to save assets as separate files and import them directly, as is standard in Archviz and many other industries. If the Asset Browser works for you, that’s great—it’s certainly a fast and efficient tool—but for our needs, the traditional method remains the best fit.
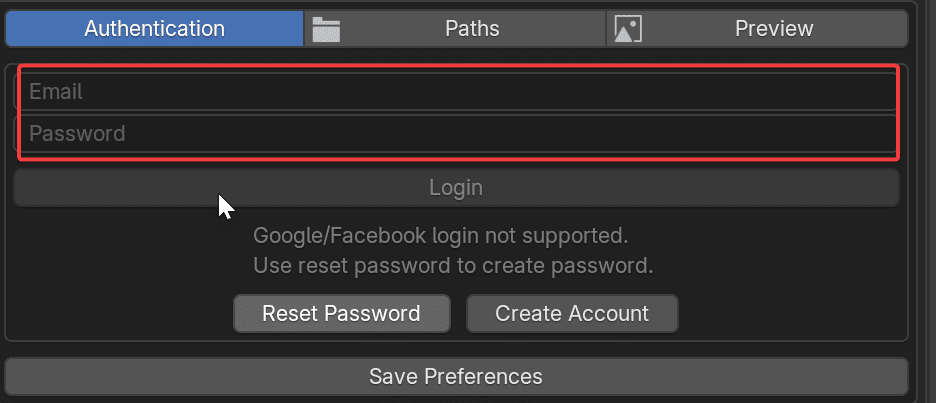
Google & Facebook Login #
At the time of making this, Google and Facebook login is not supported. So you’ll need to set up your own password.
- Click Reset Password

- Enter your email address
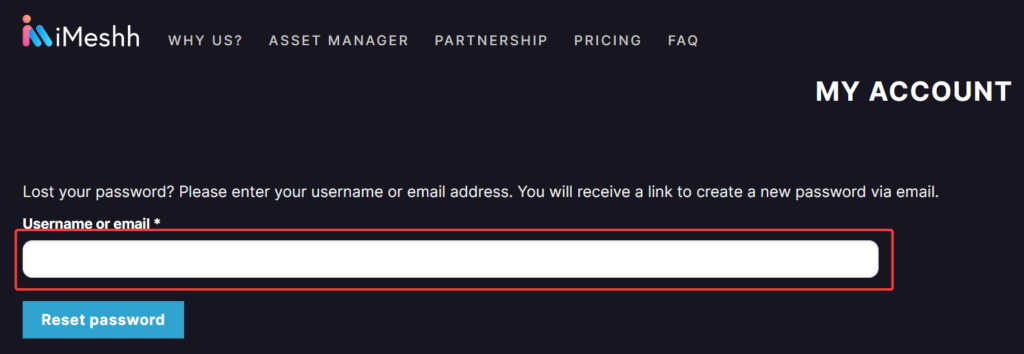
- Click on the email to reset password – This may take several minutes to arrive
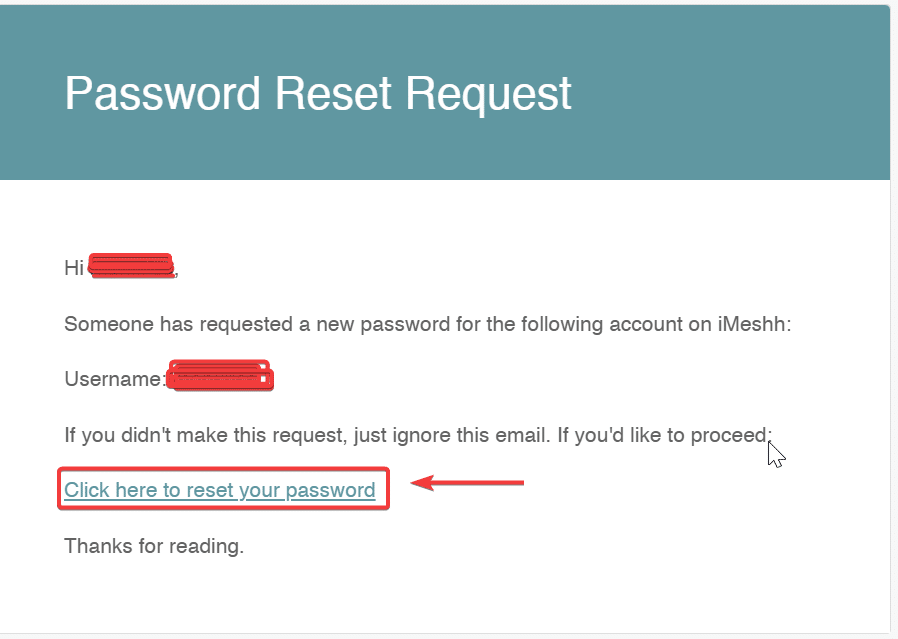
- Enter your new password and click save

- Now just enter your new password into the preferences panel
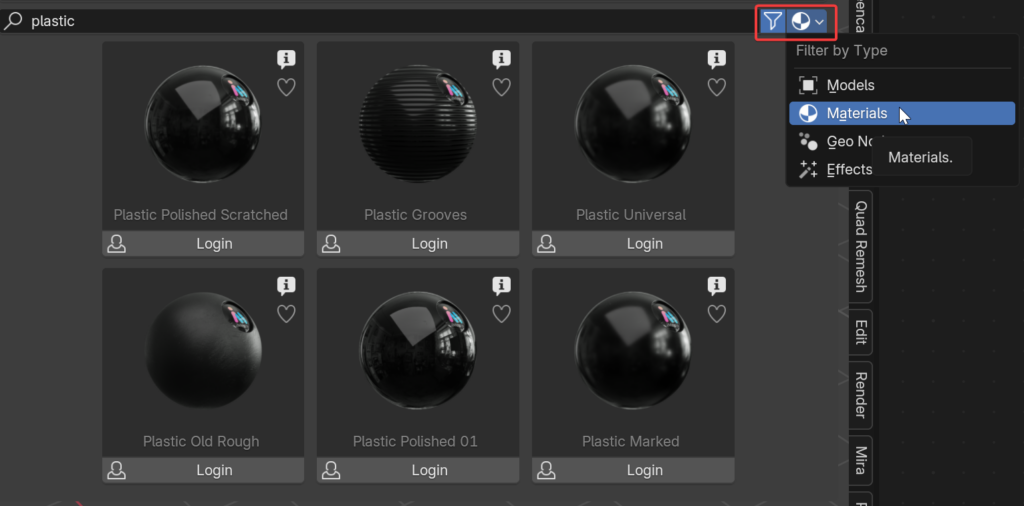
Using The Search #
Our search is LIGHTENING fast. I recommend every user makes full use of it.
One thing to note: this is a GLOBAL SEARCH, not filtered by tabs.
If you want to filter for a specific type of asset, you can enable the folder option and choose the type of object you’d like to view.
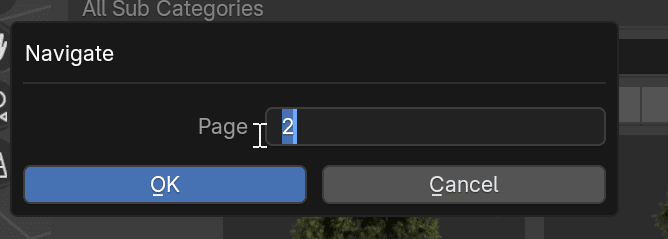
Jump to a specific page with SHIFT+LMB on any page number #
If you know the exact page you want to go to, hold SHIFT and LMB click on one of the page numbers. This will bring up a pop-up box letting you input the specific page number
Troubleshooting #
Can I use my already downloaded iMeshh assets in the addon? #
If you used iMeshh before this addon was available, you’ll need to re-download everything through the addon. All new files have been slightly updated
to make sure their format is recognized by the addon. Luckily this addon should make the process very smooth!
Nothing is loading #
If you get a screen which says Fetching but nothing happens like this:
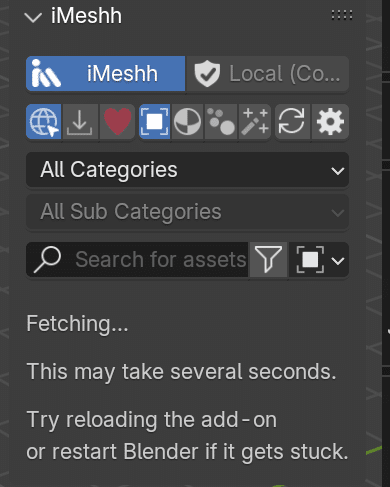
Then please either close and reopen Blender or try clicking this refresh button. This may still take a couple of minutes to display. It is downloading all product meta-data.

My images are not loading #
If you viewer is not loading like the image below then please try these options:
- Click the Reload button as in the option above.
- Try going to another page
- Use the scroll wheel while you are on the page. It may have loaded but it needs user input to trigger the update
- Restart Blender
- In rare cases, our server may think you are a bot and limit your interactions. If nothing happens at all, you may need to close blender and come back to it a little bit later so our server has time to refresh.
I downloaded a product but it still says “Download” #
This is unfortunately an error on our part, please email us or contact us on Discord to let us know. We will fix this ASAP!
I keep getting “Download limit reached” #
We have put in place a download limit for all products. However we understand most users are genuine and with this new addon they are probably re-downloading everything again.
So if this happens please reach out to us with the contact form at the bottom of this page: https://imeshh.com/index.php/faq/
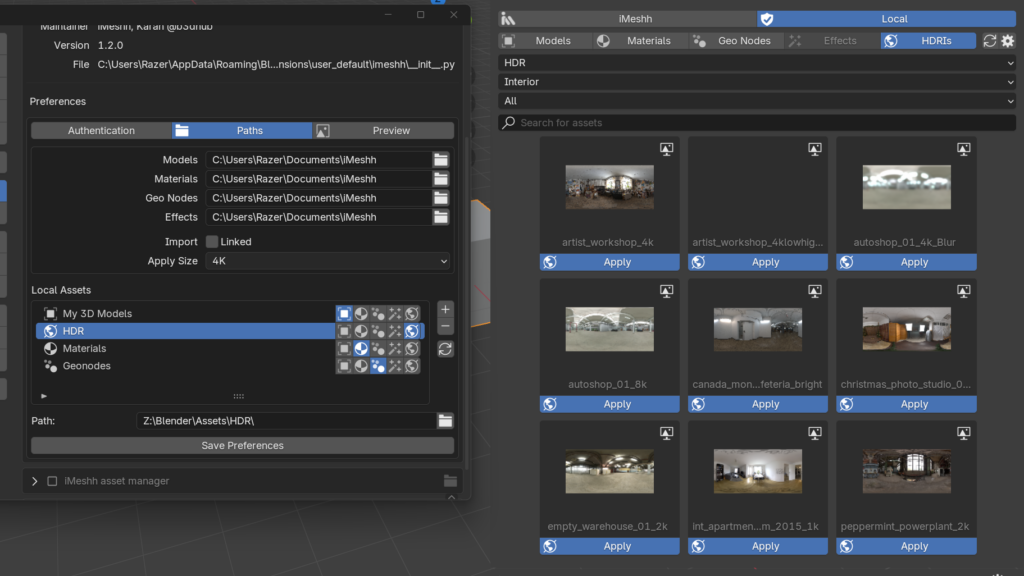
Where are my files saved? #
1. Your main file locations for your ASSETS can be chosen here. Generally it is good practice to keep different asset types separate from all your suppliers, but you can add all of these into one folder if you like!
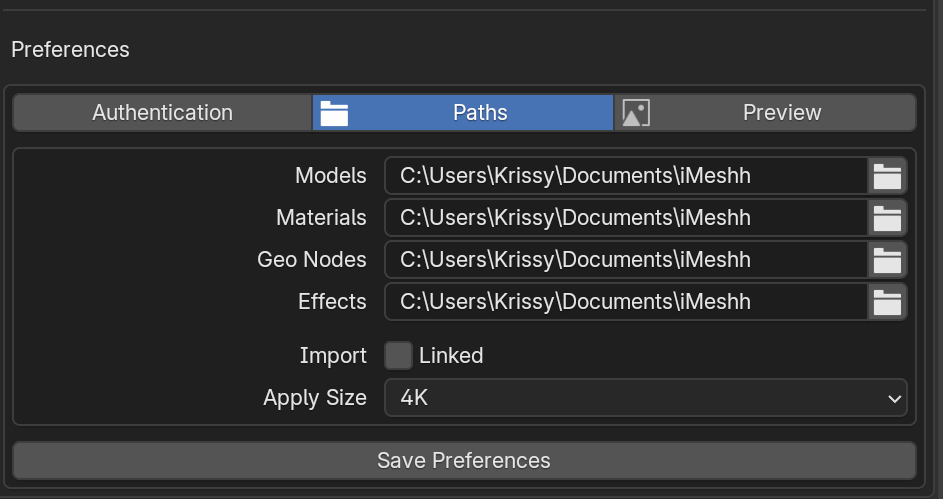
2. The second file location for the addon TECHNICAL DATA can be found in this folder: C:\Users\YOUR USER\imeshh – This folder is a special folder which you should not need to touch.
In some cases you may need to delete this folder if something is not loading or updating, this should trigger the addon to re-download the required files

The extension files themselves can be found in this folder: C:\Users\YOUR USER\AppData\Roaming\Blender Foundation\Blender\4.2\extensions\extensions_imeshh_com
If you’re having issues, you may need to entirely delete this folder when re-installing. However this should rarely (if ever) be required
